Transferring content onto the Amiga CF Card via PC/WinUAE
Windows cannot read Amiga CF cards directly as it does not support Amiga file systems. However, the card can be mounted as a hard drive via the WinUAE emulator. It can be downloaded for free from https://www.winuae.net/.
Please note that you will need at least a Kickstart3.1 rom file in order to run it. If you can’t source one, you can also buy the Amiga Forever emulation package which contains all the kickstart ROMs as well as bootable preinstalled Hard Drive images that will come in handy.
Next, you will need a CF card reader for your PC.
- Insert your Amiga-formatted CF card into the CF card reader. Windows will not be able to read this card, as it does not support Amiga file systems, so it will ask you if you want to format it. Make sure to click on NO, otherwise your whole card will be erased.
Next, in order to access the card, you will have to run WinUAE as administrator. Make sure to configure it with at least a 68020 cpu, A1200 emulated hard drive controller, sufficient amount of memory (8 MB or more should be enough).
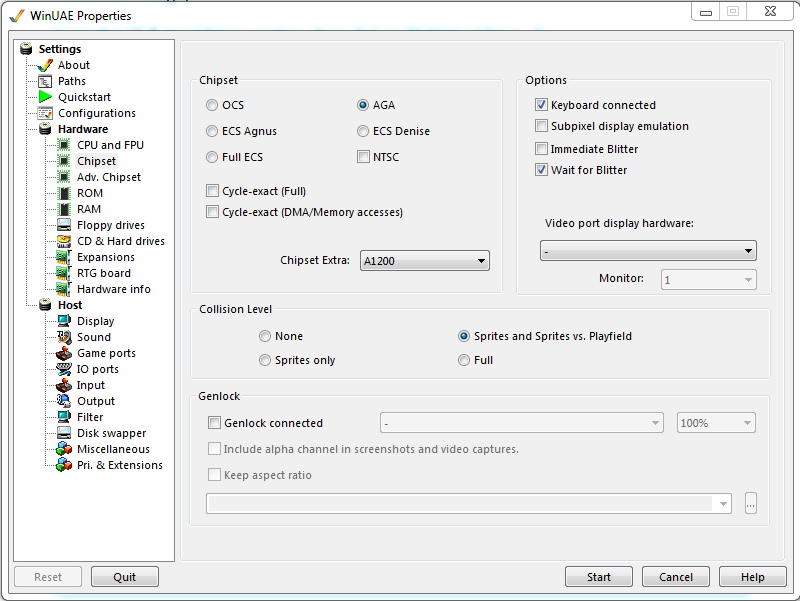
- Go to the CD & Hard Drives section, then click on “Add Hard Drive…”
- Select the CF card from the list of drives. It will be listed with text beginning with [RDB].
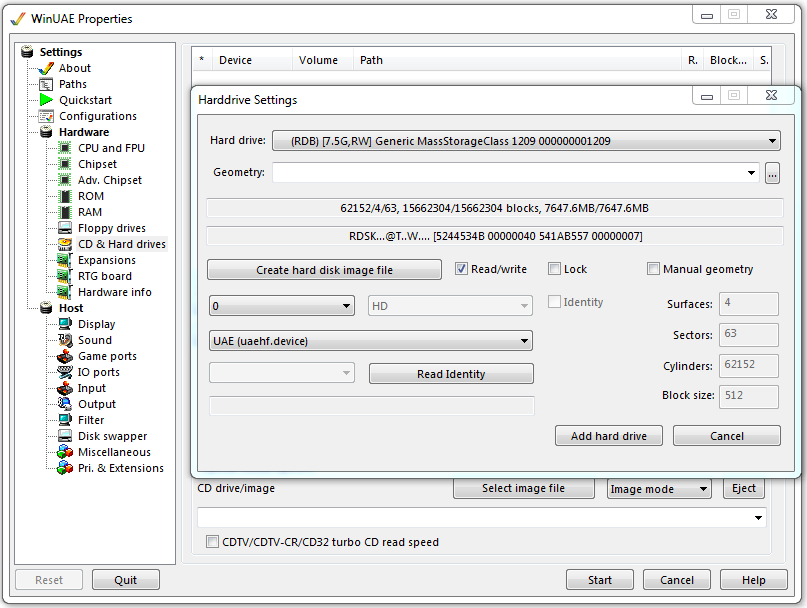
- Click on “Add hard drive”
The hard drive will appear on the list of added devices:

If you do not have your own Hard file already preconfigured, you can use the CF card as your boot drive, but make sure you are emulating an A1200 and not another machine, as the card may fail to boot otherwise. Next, you will need to add your PC drive (e.g. C:\) through which you can share files between the two systems. You can either click on “Add PC drives at startup” or you can click on “Add Directory or Archive…” and add the directory or a drive through which you want to share files. The following example shows how to select the C drive:
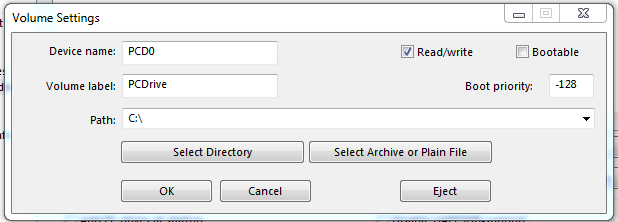
Make sure to deselect “Bootable” as your system won’t be able to boot from this drive.
Device name is the Amiga Device name you want to give the unit. Volume label is what you want the drive to be called under AmigaOS.
If you did everything correctly, you will have two drives listed now:
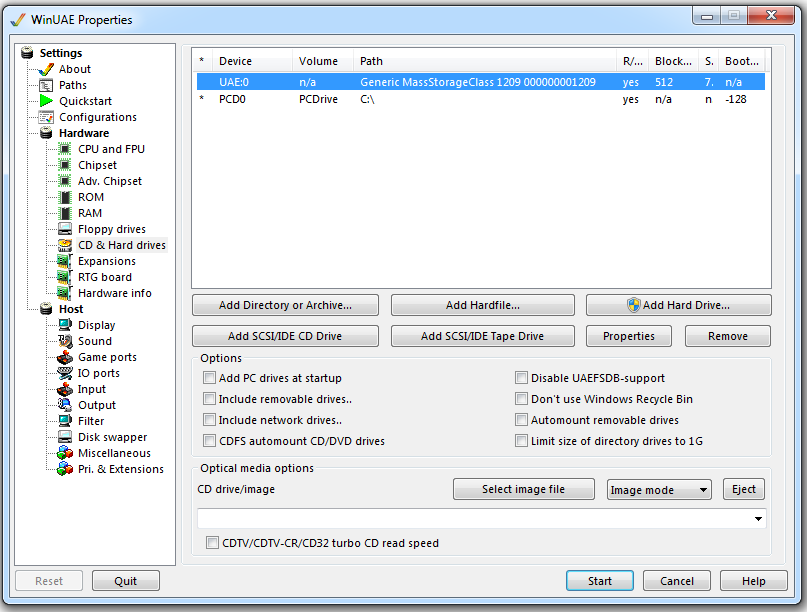
Make sure to save your configuration so you don’t have to reconfigure it manually every time.
Now you can click on Start. If you did everything correctly, the emulated Amiga will boot from the CF card and you should get a desktop looking something like this:
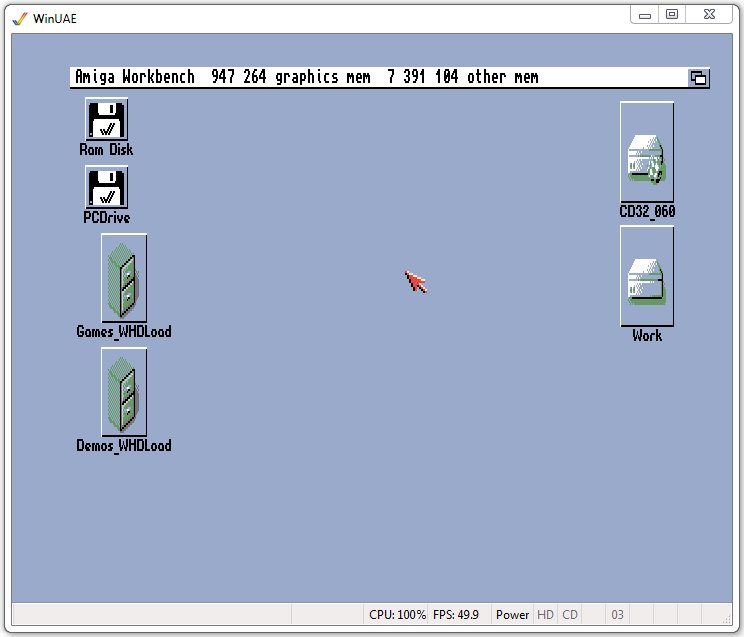
Now, you can access your PCDrive (C:\) in the Amiga emulated environment and use it to copy any files you have downloaded and stored there from the internet. Keep in mind that Amiga automatically hides files that do not have an icon (.info file), so in order to show all files on the PC Drive, hold down the right mouse button to access the menu, then select Window > Show > All files

You can download WHDLoad archives and unpack them in their own directory on the PC side and then simply drag and drop them on the Amiga drive. For games, you should use the Games_WHDLoad drawer, and for other software you can copy it into Work.
Software like WinRAR and 7zip supports the Amiga lha arhive format.
Lastly, make sure to quit WinUAE before removing the CF card from the CF reader.
